Let’s build a third pipeline to copy the wta_matches files.
Matches Pipeline
Take a moment to explore the matches files in github. The files follow a consistent naming convention: wta_matches_yyyy.csv, where yyyy represents the year of the WTA season and is a value between 1968 and 2020.
Explore the files in raw view. Note that they contain headers on first row. We have seen that this information is needed when defining the dataset.
The wta_players and wta_ranking files that we have copied earlier do not include header on first row. Therefore, the datasets that we have used to represent them have been instructed that the first row doesn’t contain any header. We did this by leaving the setting First row as header unchecked.
We want to reuse the datasets we already have, and represent the wta_matches csv’s in the tennis_wta repository also.
Open Data Factory UI and let’s start by parametrizing the First row as header setting.
1. Parametrizing First row as header setting for the Source and Sink datasets
Open the ds_HTTP_tennis_wta dataset and in the Parameters section click to add a new parameter. Name it hasHeader, choose type Bool and set false as default value.

On the Connection section, add dynamic content to the First row as header setting and choose the hasHeader parameter. The ds_HTTP_tennis_wta settings should look like this:

Repeat the steps to add a similar hasHeader parameter to the ds_ADLS_tennis_wta dataset, and add dynamic content to the First row as header setting. The ds_ADLS_tennis_wta settings should look like this:

Select one of the existing pipelines, for example pl_data_HTTP_toADLS_players. On the Source and Sink sections of the Copy data activity, note the newly created hasHeader parameter, with default value false.

Everything looks good! You can debug to test that the pipeline still runs as it should and then select Publish all to persist the changes.
2. The Until activity. Increment variables using an Until activity.
Create a new pipeline and name it pl_data_HTTP_to_ADLS_matches. Then, add two pipeline parameters: yearStart and yearEnd, of type Int and default values 1968 and 2020 respectively.

We will use an auxiliary variable, year, that takes values in the range [yearStart, yearEnd]. We will build the filename using this variable. The matches files follow the consistent naming convention wta_matches_year.csv.
One solution is to keep the range of values between yearStart and yearEnd in an array, and then, using a ForEach loop we can iterate through the array, build the filename, and copy the file with a Copy data activity.
Another solutions is to obtain the next filename incrementing the variable year with 1, and run a Copy data activity, to copy the current wta_matches_year.csv file, until the variable year is out of range (year > yearEnd). Le’ts implement this solution using the Until activity.
The Until activity provides the same functionality that a do-until looping structure provides in programming languages. It executes a set of activities in a loop until the condition associated with the activity evaluates to true.
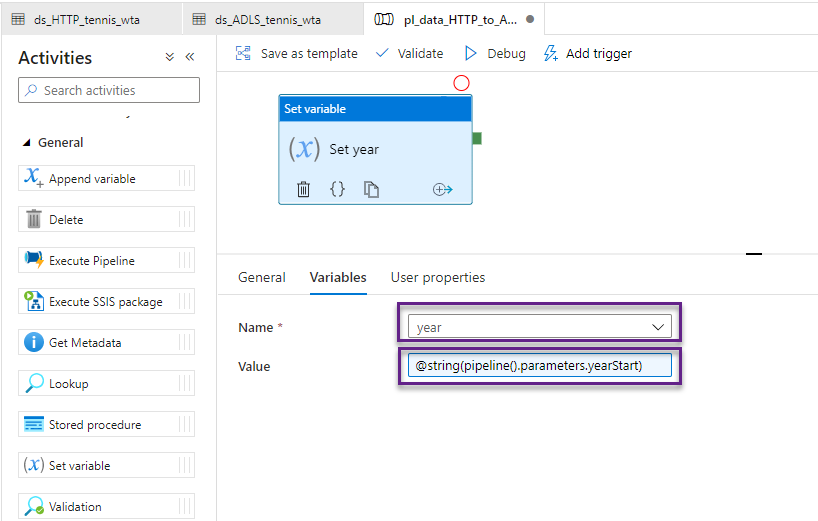
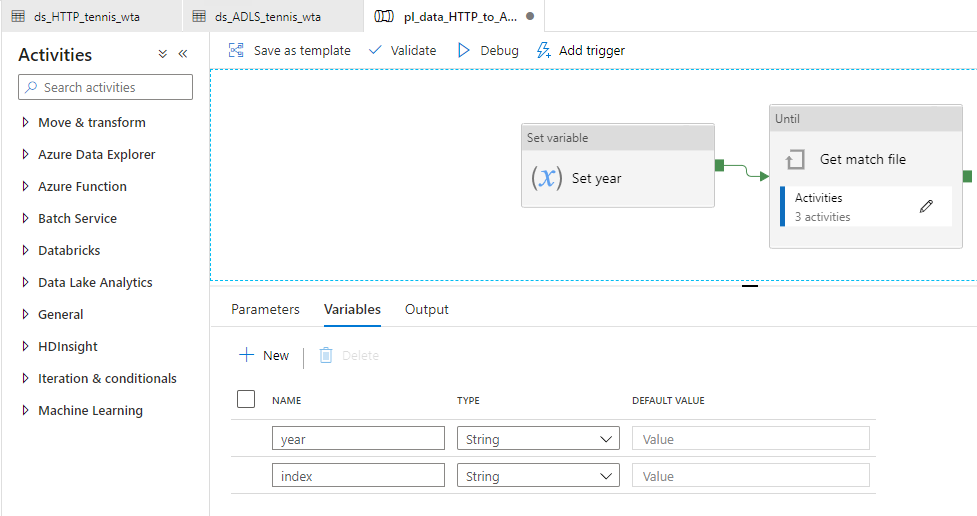
Let’s start by defining the year variable. In the Variables sections, click +New to add a new variable, and name it year. Choose type String. Currently variables can have only three type: String, Boolean or Array.
Add a second variable, and name it index, type String. We will get back to this soon. For now, just make sure to create it as point.
Drag and drop on the canvas a Set variable activity, and name it Set year. In the Variables section, select the variable year and add dynamic content in the Value field, as shown below:
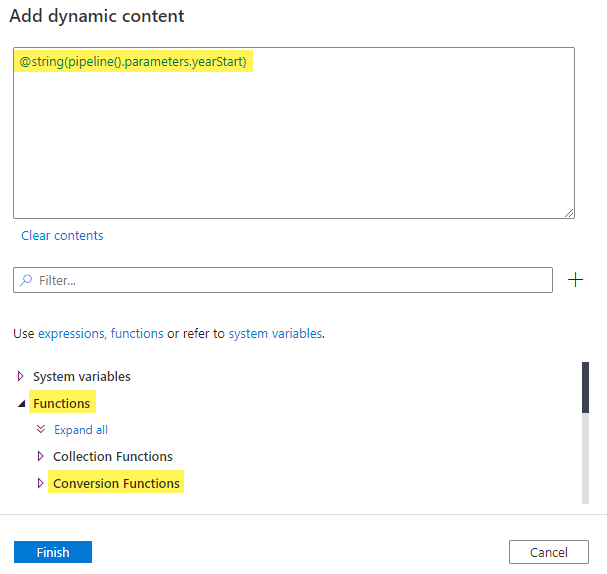
Note that we need to convert yearStart, of type Int, to String, because the variable year is of type String! Your screen should look like this:
From the Iteration & conditionals section, add an Until activity on the canvas, and chain it with the Set variable activity. Name the activity Get match file. Switch to the Settings section to build the evaluation condition.

The Until activity executes its child activities in a loop, until the condition it’s associated with, evaluates to true. So, the loop continues, while its condition evaluates to false!
If we write the condition: year > yearEnd, the condition evaluates to false for all the values in the range [yearStart, yearEnd], and the loop continues. Let’s write this condition, as dynamic content. Recall that year is of type String, whereas yearEnd is Int. We will have to do the necessary type conversions.

At this point, the screen should look like the image below. Click Add Activity button to start adding child activities.

First, let’s add a Copy data activity. Name it Copy matches csv. In the Source section, select the ds_HTTP_tennis_wta dataset. Set the parameter fileName to dynamic content @concat(‘wta_matches_’,variables(‘year’),’.csv’). Set the parameter hasHeader to true.
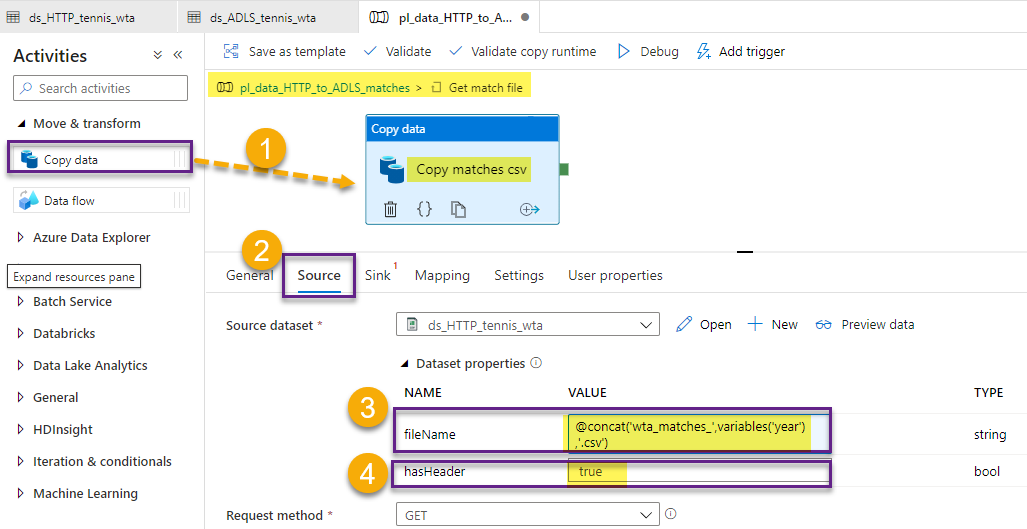
In the Sink section, select the ds_ADLS_tennis_wta dataset. Provide the subfolder parameter the value matches, and set hasHeader to true.

Recall the index variable we have created earlier? Drag and drop a Set variable activity on the canvas, and chain it with the Copy data activity. Name it Set index, and in the Variables section, select the variable index and set the value to @variables(‘year’).

Add a second Set variable activity and chain it with the Copy data activity. Here, we are going to increment year. This is where the variable index comes into play. We can not self-reference a variable in an expression. Because of this limitation, we can not assign the variable year, the value year+1. Instead, we will assign the value index+1.

Return to the pipeline workflow. At this point, it should look like this:
We are ready to test out work. Validate and press Debug. You will be presented with the Pipeline run window, where you can provide the yearStart and yearEnd parameters. Leave the defaults and press Ok.

Check the Output window. 161 items run in total:
- one Set year activity
- one Get match file loop
- 53 iterations of 3 activities each (Set index, Copy matches csv, Set next year)

Select Publish All to persist your changes.
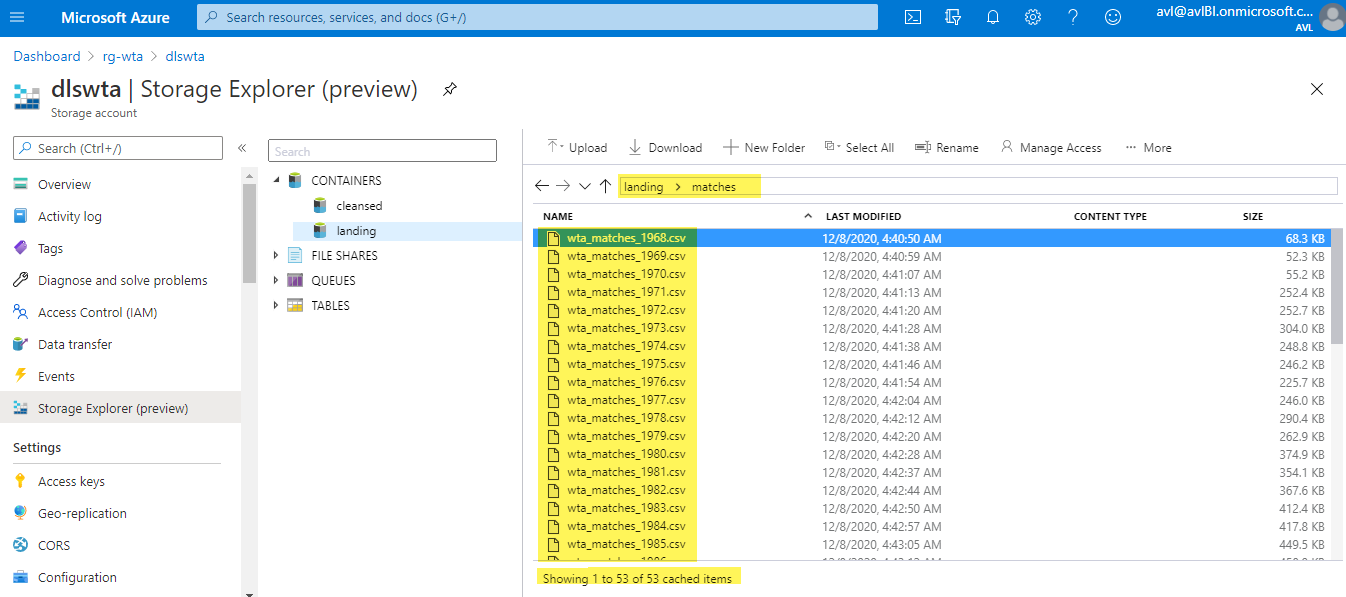
Head over to Azure Portal and check that the matches files are now in the data lake. Find your way to the landing/matches folder in your ADLS using Storage Explorer as described in the previous posts.
What’s next
Now that we have copied all files to our data lake, let’s have a look at how Azure Data Factory integrates with GitHub, and put all our pipelines in a GitHub repository.🐳
Want to read more?
Microsoft learning resources and documentation:
Until activity in Azure Data Factory
