The next step in our WTA Insights data journey is to cleanse and transform the tennis_wta files that we have ingested in our data lake. The plan is to use Databricks to prep the csv files and then store them back on the data lake, in the cleansed layer, ready for Power BI to consume them.
Let’s start by creating a Databricks service.
Provisioning Azure Databricks
On the Azure portal, select + Create a resource, in the upper left-hand corner, then do a quick search for databricks. Choose Azure Databricks and click Create.

In the Create an Azure Databricks workspace page, in the Basics section, select your Azure subscription and the resource group you created during the Kickoff series. Name the Databricks workspace dbw-wta. Select the same region as for your resource group. For the Pricing Tier, choose Trial (Premium – 14-Days Free DBUs). Read more about Azure Databricks pricing here, and use your trial days wisely!
Lastly, click Review + Create to deploy the resource.

Deployment can take a while. During deployment you will be presented with a screen similar to the one below:
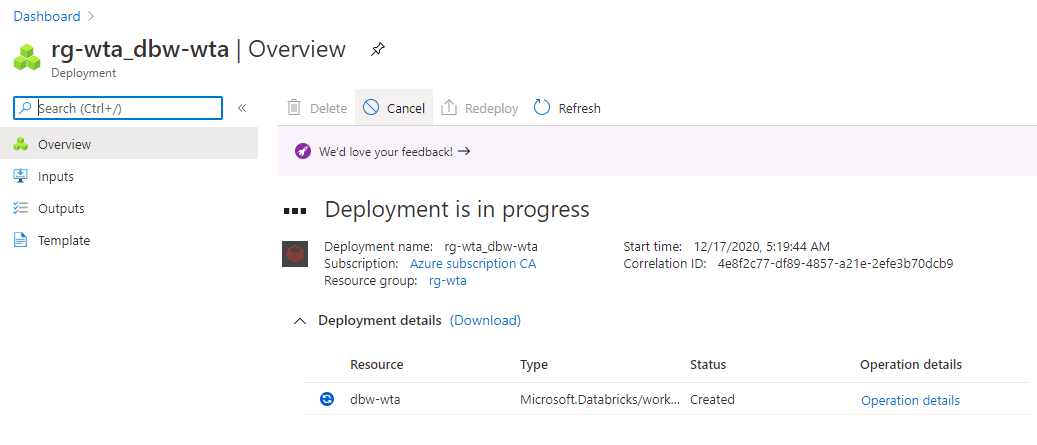
When deployment is complete, hit Go to resource to open the Databricks service we have just created.

Databricks Workspace
The Databricks workspace is an environment for accessing all Azure Databricks assets (notebooks, libraries, dashboards and experiments), and enables data scientists, data engineers and businesses to collaborate closely together.
At this point you should be on the Overview page of your newly created dbw-wta databricks service.
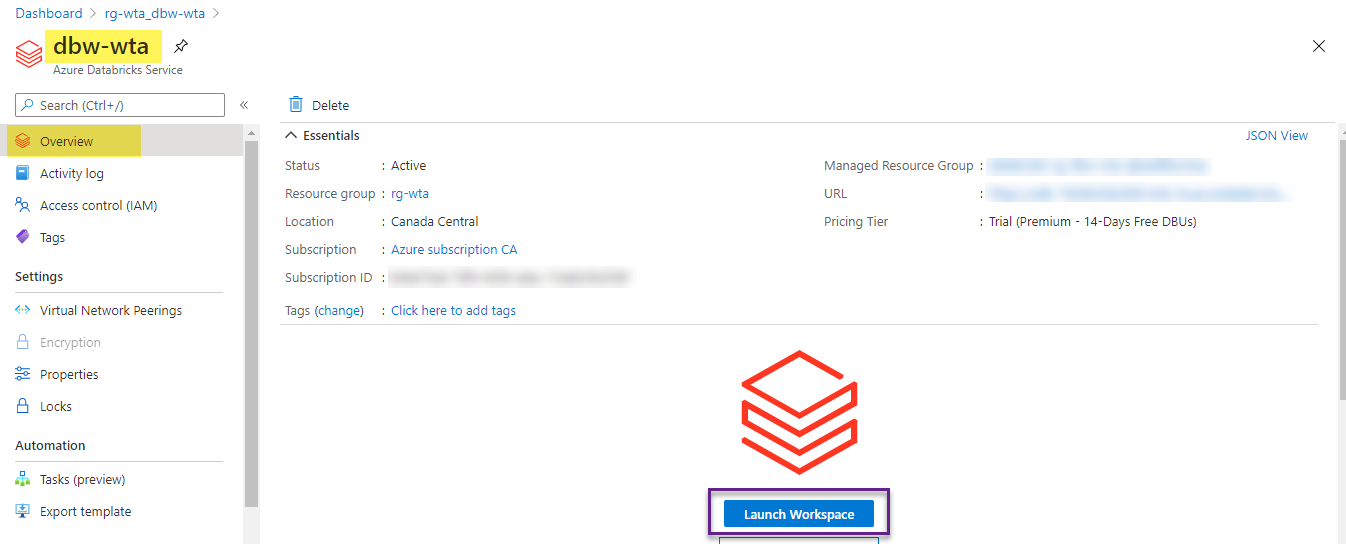
Click Launch Workspace to launch the Azure Databricks portal in a separate browser tab.
Databricks clusters
A Databricks cluster is a set of computation resources and configurations on which you run data engineering, data science and data analytics workloads.
On the Databricks portal, click on Clusters in the vertical bar, and create a new Spark cluster by clicking + Create Cluster.

Fill out the New Cluster form as shown in the image below.
Give the cluster a name, for example wtaCluster.
Choose the Standard cluster mode, which is the recommended mode for single-user clusters.
Disable autoscaling, and set Workers to 1, as we want to minimize costs for our low workloads.
Set a smaller termination interval, for example 30 minutes. If the cluster is not in use after 30 minutes, it will automatically be deleted.
Choose the smallest server available (Standard_F4s) in order to minimize costs.
Lastly, hit Create Cluster.

It can take up to a few minutes to provision the cluster. During this time its state is Pending.

Once the cluster is provisioned, the state is Running. Note that we have 2 nodes: a master – a virtual machine that orchestrates all script execution, and a worker node – a virtual machine that will run all our scripts.

Just before we finish this post, head over to your dashboard on the Azure portal. Note that resources associated with the cluster (for example the two virtual machines for your two nodes) are deployed to a locked resource group databricks-rg-dbw-wta-………...

What’s next
Now that we have provisioned our first Azure Databricks and Spark cluster, we will create our first notebook using Python.🐳
Want to read more?
Microsoft learning resources and documentation:
What is Azure Databricks
Azure Databricks workspace concepts
Data engineering with Azure Databricks
Databricks workspace guide
