Now that we have provisioned a Databricks workspace and have created a Spark cluster, it is time to get spinning by writing our first notebook.
A notebook is a collection of cells. These cells are run to execute code, to render formatted text, or to display graphical visualizations.
A Databricks notebook cell can execute Python, SQL, R or Scala code.
Players Notebook
We will use Python to transform and cleanse the tennis_wta csv files that we have ingested in our datalake. Our first notebook will load the wta_players.csv file from the landing/players folder in our ADLS gen2, will do the necessary transformations, and then will write the transformed file back to the data lake, in the cleansed folder.
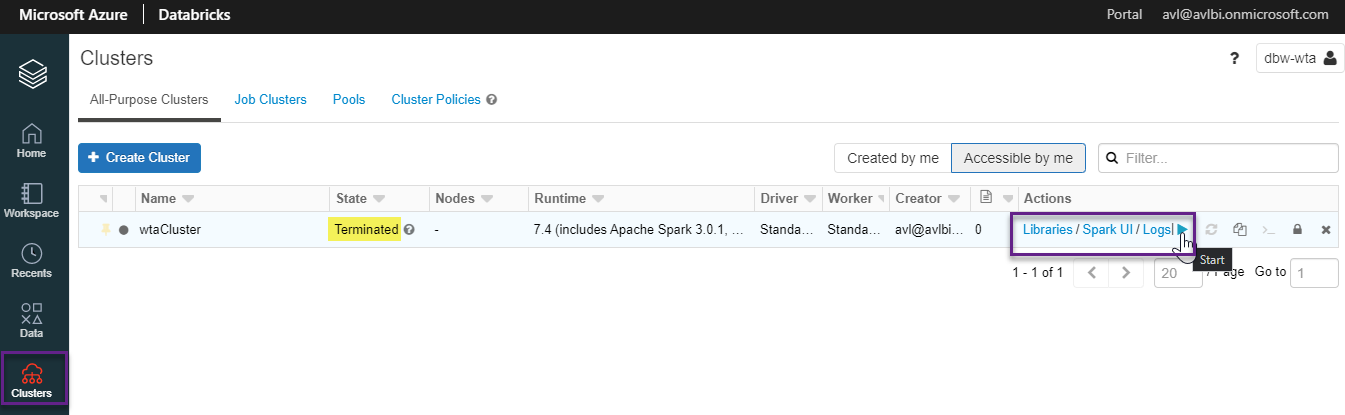
Launch the Databricks portal, and select the Clusters tab from the vertical options menu. In the previous post, we have configured our wtaCluster to terminate after 30 minutes of inactivity. If the state is Terminated, start the cluster, as shown in the image below.
It may take a few minutes for the cluster to start. When the state is Running, head over to the Workspace tab, click Create and select Notebook.

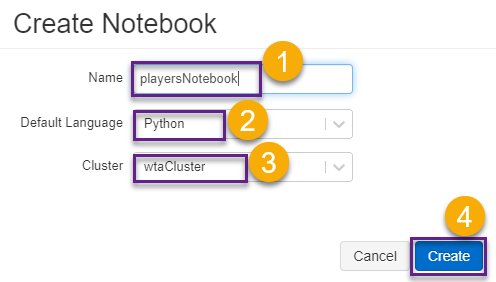
In the Create Notebook screen, name the notebook playersNotebook, select Python from the language dropdown list, and select the wtaCluster from the cluster list. Click Create to create the notebook.
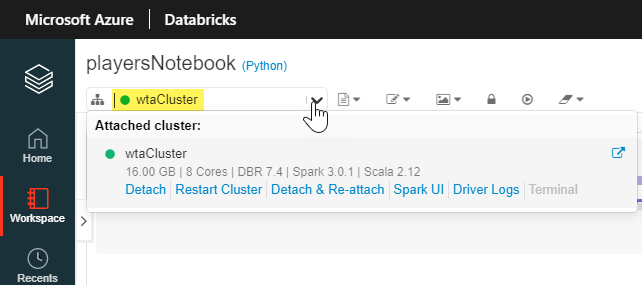
The command bar on the top of each notebook displays information about the cluster that notebook is attached to. The green circle signals that the cluster is running.
If the cluster is idle for too long (30 minutes in our case), it will automatically be terminated and the notebook is detached. A gray circle signals that the cluster is not in usable state.
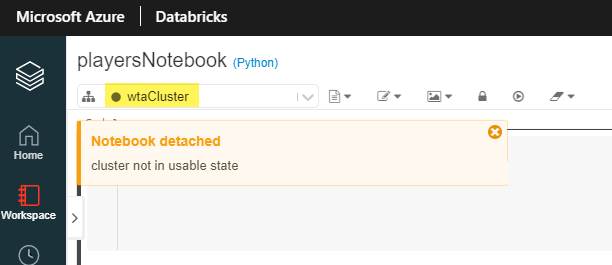
Before we can do any work in the notebook, make sure it is attached to a cluster. Click on Start Cluster. You will see the green circle once it is started.

1. Accessing ADLS gen2 storage from Databricks
There are four ways of accessing ADLS gen2:
- Pass your Azure Active Directory credentials (credential passthrough)
- Mount an Azure Data Lake Storage Gen2 filesystem to DBFS using a service principal and OAuth 2.0
- Use a service principal directly
- Use the Azure Data Lake Storage Gen2 storage account access key directly
For the purpose of our demos, assuming that you do not have access to an Azure Active Directory subscription, we will access the storage account access key directly. However, keep in mind that this is the least secure way to access the data lake.
Head over to the Azure Portal, and from your data lake resource, under the Settings blade, choose Access keys. Click the copy button, and take note of the key1 Key. Be careful not to share this information, as it provides full access to your data lake.
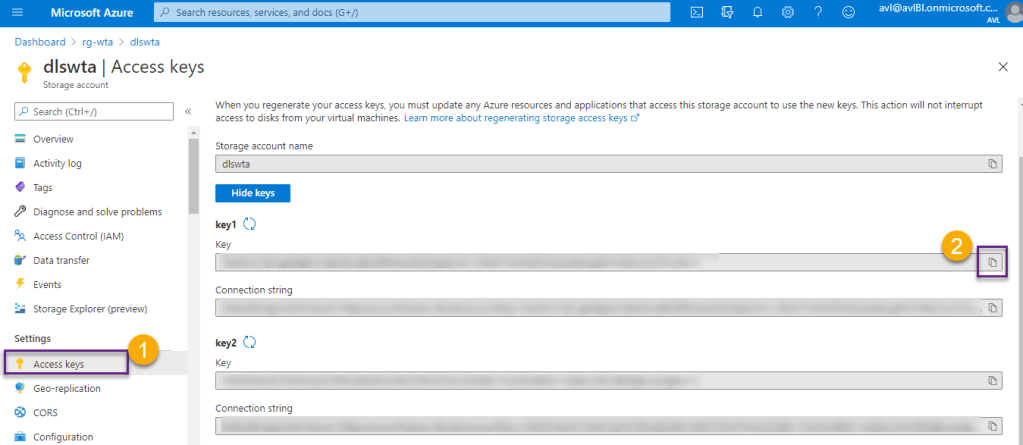
We need to set the data lake context at the start of the notebook session. Write the following code into the first cell of our playersNotebook. Paste your key1 account key between the double quotes of the accountKey variable.
accountName = "dlswta";
accountKey = "<your-key1>";
config = "fs.azure.account.key." + accountName + ".dfs.core.windows.net"

spark.conf.set(config, accountKey)
Press the Run button to Run Cell or use the Shift+Enter shortcut.

2. Read data
Add a new cell and use the following code to list the content of the landing/players folder in our data lake.
dbutils.fs.ls("abfss://landing@dlswta.dfs.core.windows.net/players")The output displays information about the wta_players.csv file.

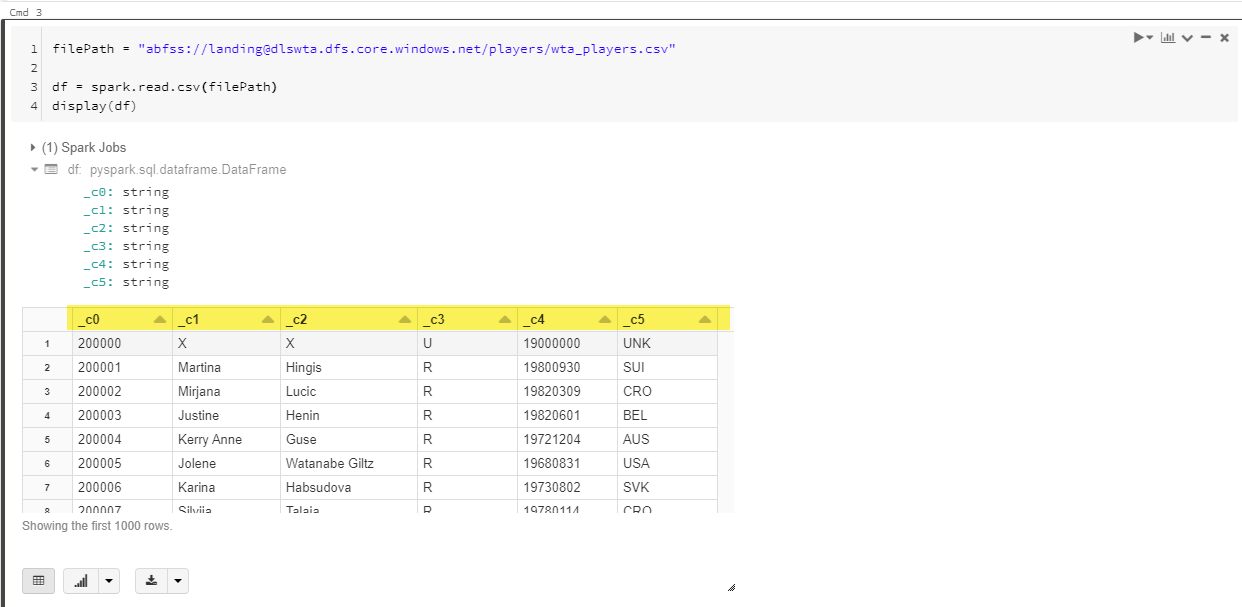
Load the wta_players.csv file into a dataframe using spark.read.csv(filePath), and display the content of the dataframe.
filePath = "abfss://landing@dlswta.dfs.core.windows.net/players/wta_players.csv"

df = spark.read.csv(filePath)
display(df)
Note the column headers: _c0 for the first column, _c1 for the second and so on. Default type for all columns is String.
3. Transform data
Use the code below to define a schema for this file, providing column names and types. The wta_player.csv columns are: player_id, first_name, last_name, hand, birth_date, country_code.
from pyspark.sql.types import *

schema = StructType([
  StructField("player_id", IntegerType(), True),
  StructField("first_name",StringType(), True),
  StructField("last_name", StringType(), True),
  StructField("hand", StringType(), True),
  StructField("birth_date", IntegerType(), True),
  StructField("country_code", StringType(), True),
])

df = spark.read.csv(filePath, header=False, schema=schema)
display(df)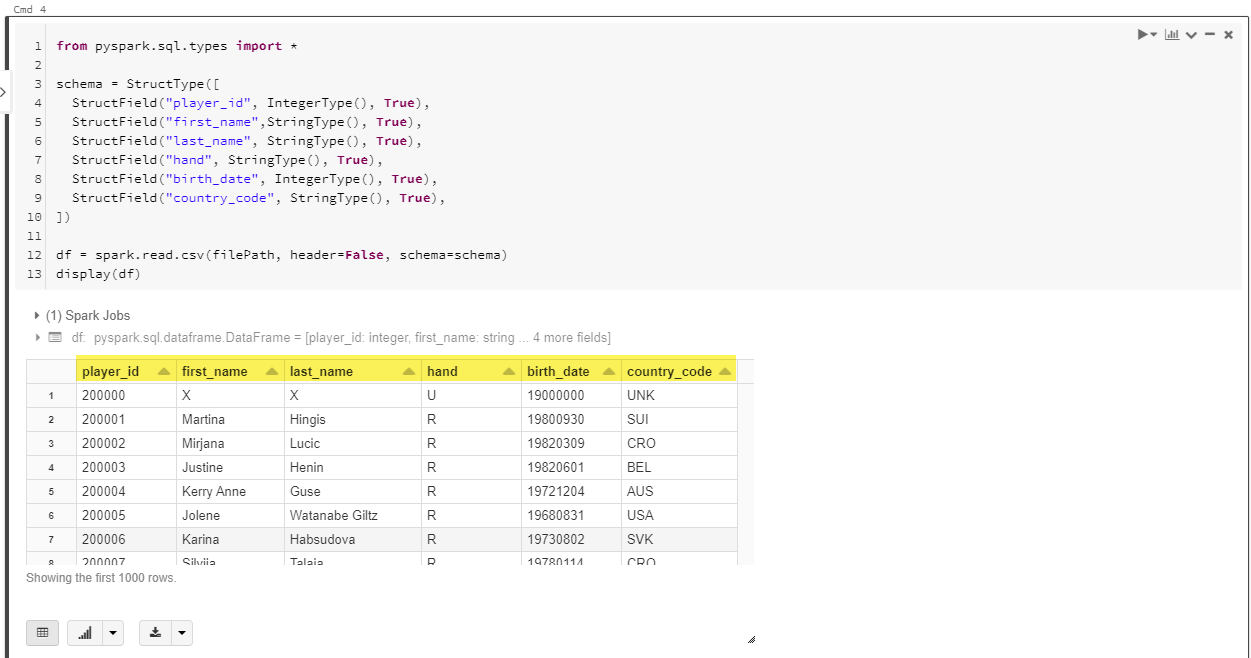
4. Write processed data
Lastly, let’s save this dataframe to the cleansed zone of our data lake.
destPath = "abfss://cleansed@dlswta.dfs.core.windows.net/players"

df.coalesce(1).write.csv(destPath, header="true", mode="overwrite")
Back to Azure Portal, navigate to your data lake Storage Explorer to check the new data in the cleansed zone. There are a few things to note here:
- The newly created players folder contains multiple files:
- _started_…, _committed_… and _SUCCESS are auto generated files that track the write process
- the actual csv file. File naming is handled in the background by Databricks and cannot be controlled.
- If you have a large dataset, Databricks might write more then one output file, depending on the number of partitions Spark engine splits data into. We have used the command df.coalesce(1) to force one partition.

The notebook we created in this post is available on github here.
Rankings Notebook
As a practice exercise, create a new notebook and name it rankingsNotebook. Use Python to access ADLS gen2 and load into a dataframe all wta_rankings files located in landing/rankings folder of your data lake. Define a schema and specify the column names and data types. The columns for the ranking files are: ranking_date, ranking, player_id, ranking_points, tours. All columns are Integers. Lastly, write the data to the cleansed zone of your data lake, in a folder named rankings.
Hint 1: Recall from the previous posts on Azure Data Factory, that we have ingested in our data lake 4 ranking files. Use dbutils to list the content of the landing/rankings folder.
dbutils.fs.ls("abfss://landing@dlswta.dfs.core.windows.net/rankings")
Hint 2: To load all files in a folder into the dataframe you can use *.csv in the file path.
#set the data lake file location
filePath = "abfss://landing@dlswta.dfs.core.windows.net/rankings/*.csv"

#read the data into df dataframe
df = spark.read.csv(filePath)
display(df)
Hint 3: Define a schema providing column names and data types.
from pyspark.sql.types import *

#define a schema providing column names and data types
schema = StructType([
  StructField("ranking_date", IntegerType(), True),
  StructField("ranking",IntegerType(), True),
  StructField("player_id", IntegerType(), True),
  StructField("ranking_points", IntegerType(), True),
  StructField("tours", IntegerType(), True)
])

df = spark.read.csv(filePath, header=False, schema=schema)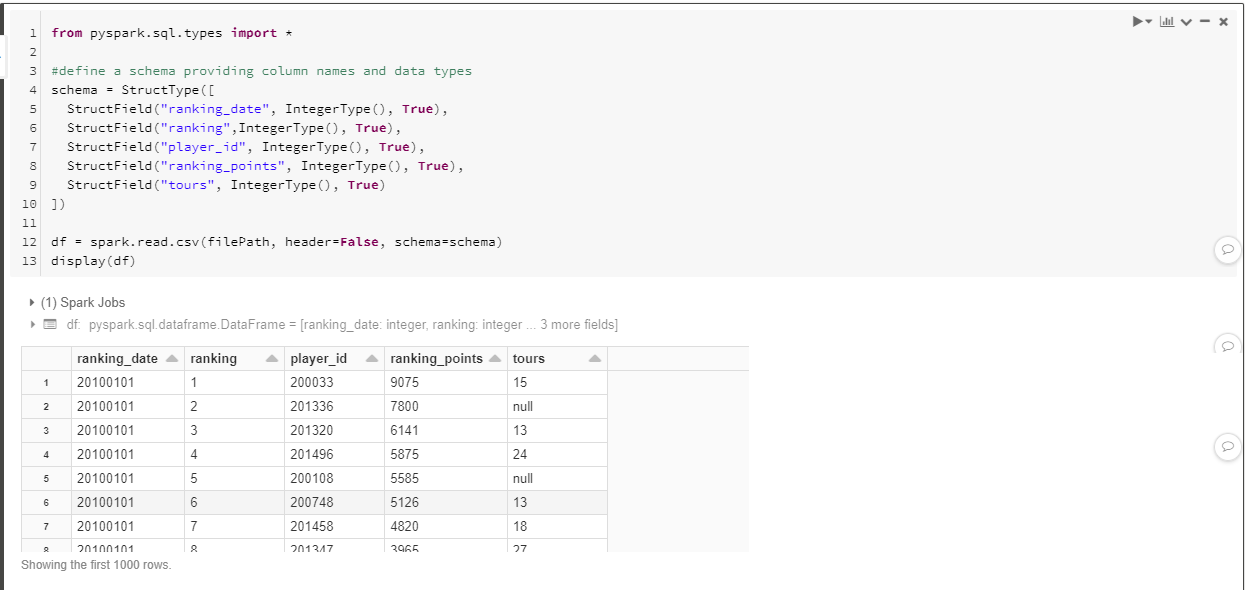
Hint 4: Use df.coalesce(1).write.csv() command to write to the cleansed zone of your data lake, forcing one partition.
#set the data lake destination path
destPath = "abfss://cleansed@dlswta.dfs.core.windows.net/rankings"

#write the data to the new location forcing one partition
df.coalesce(1).write.csv(destPath, header="true", mode="overwrite")
To check your work, have a look at the rankingsNotebook available on github here.
What’s next
We continue to prep and transform the remaining files – the wta_matches csv’s.🐳
Want to read more?
Microsoft learning resources and documentation:
User guide – Notebooks
Databricks Workspace guide – Azure Data Lake Storage Gen2
