It’s time to grab our puzzle pieces and start putting together the edges. 🧩🧩
Recall that we have loaded the wta_tennis data in the cleansed area of our data lake. We now want to connect to the data lake and load the files in Power BI desktop.
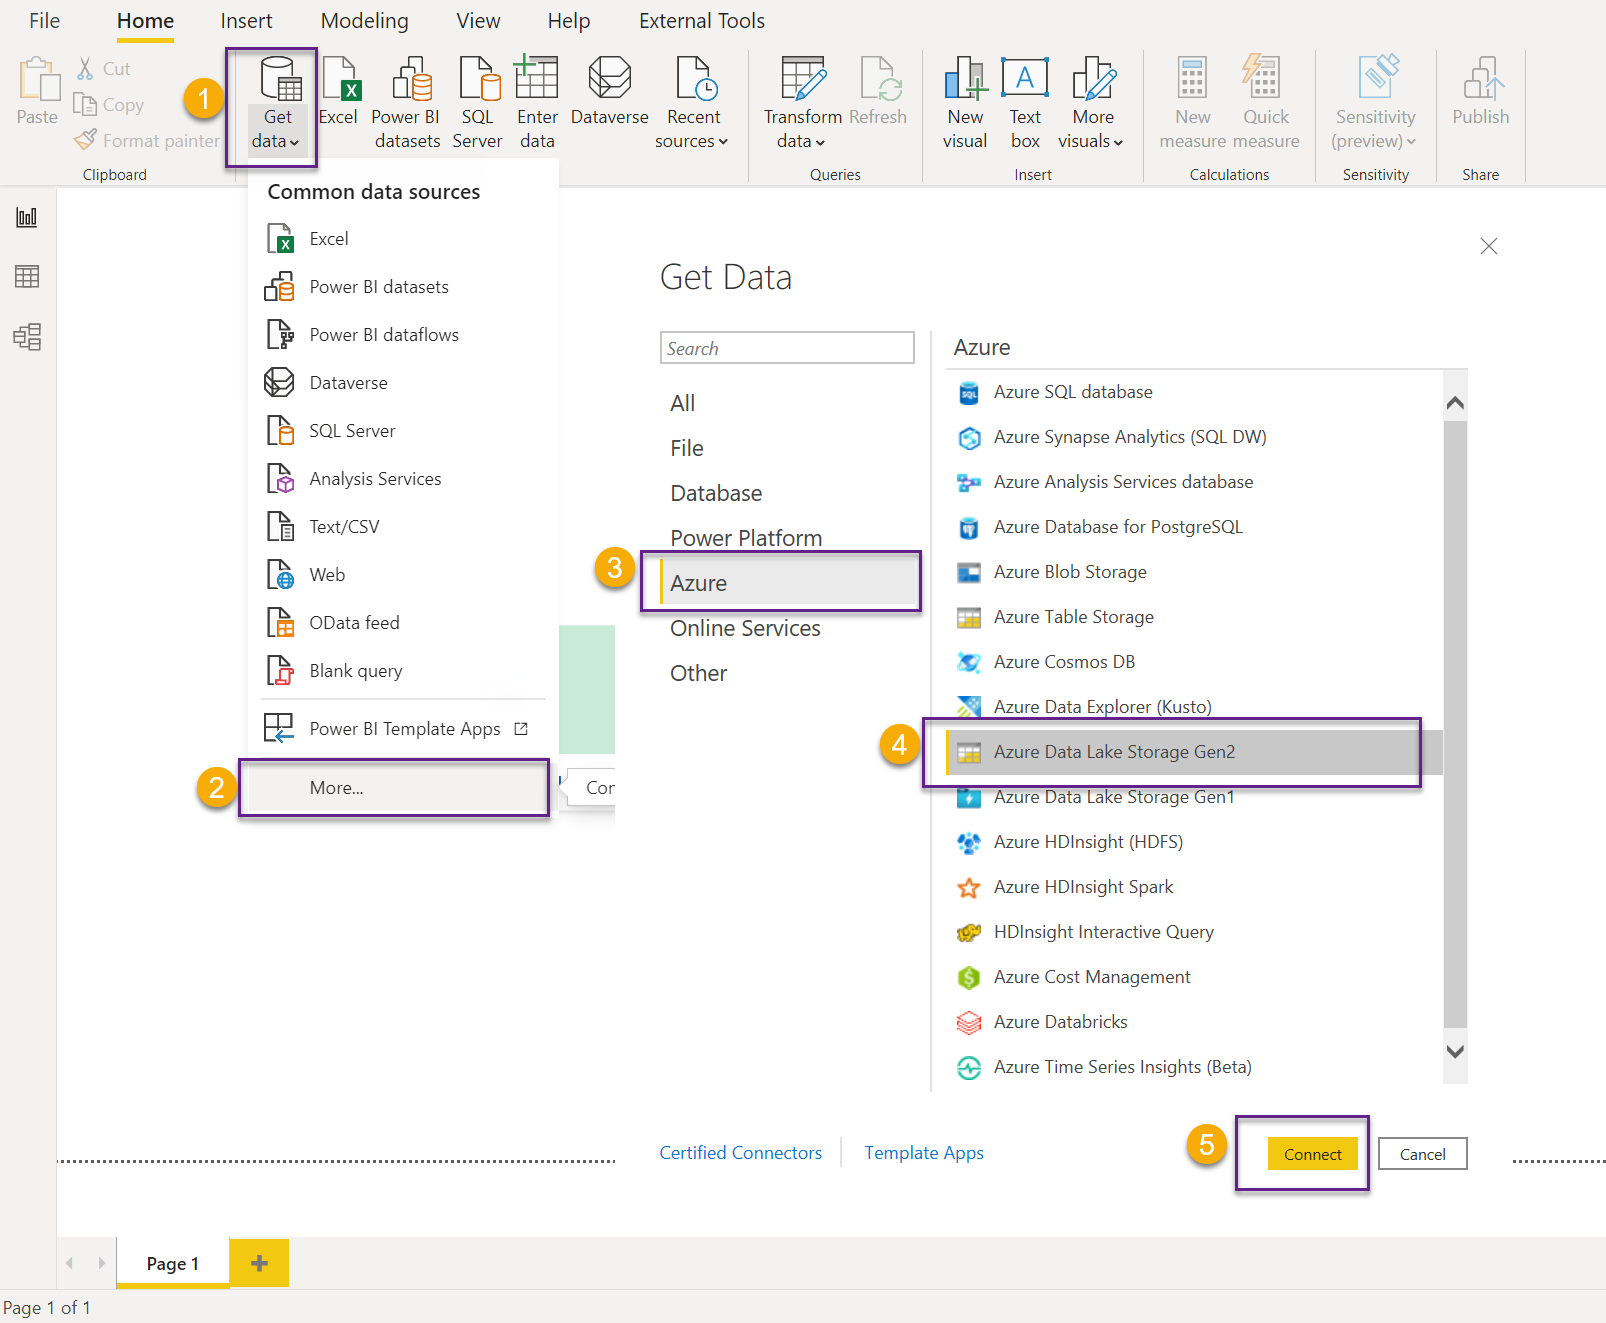
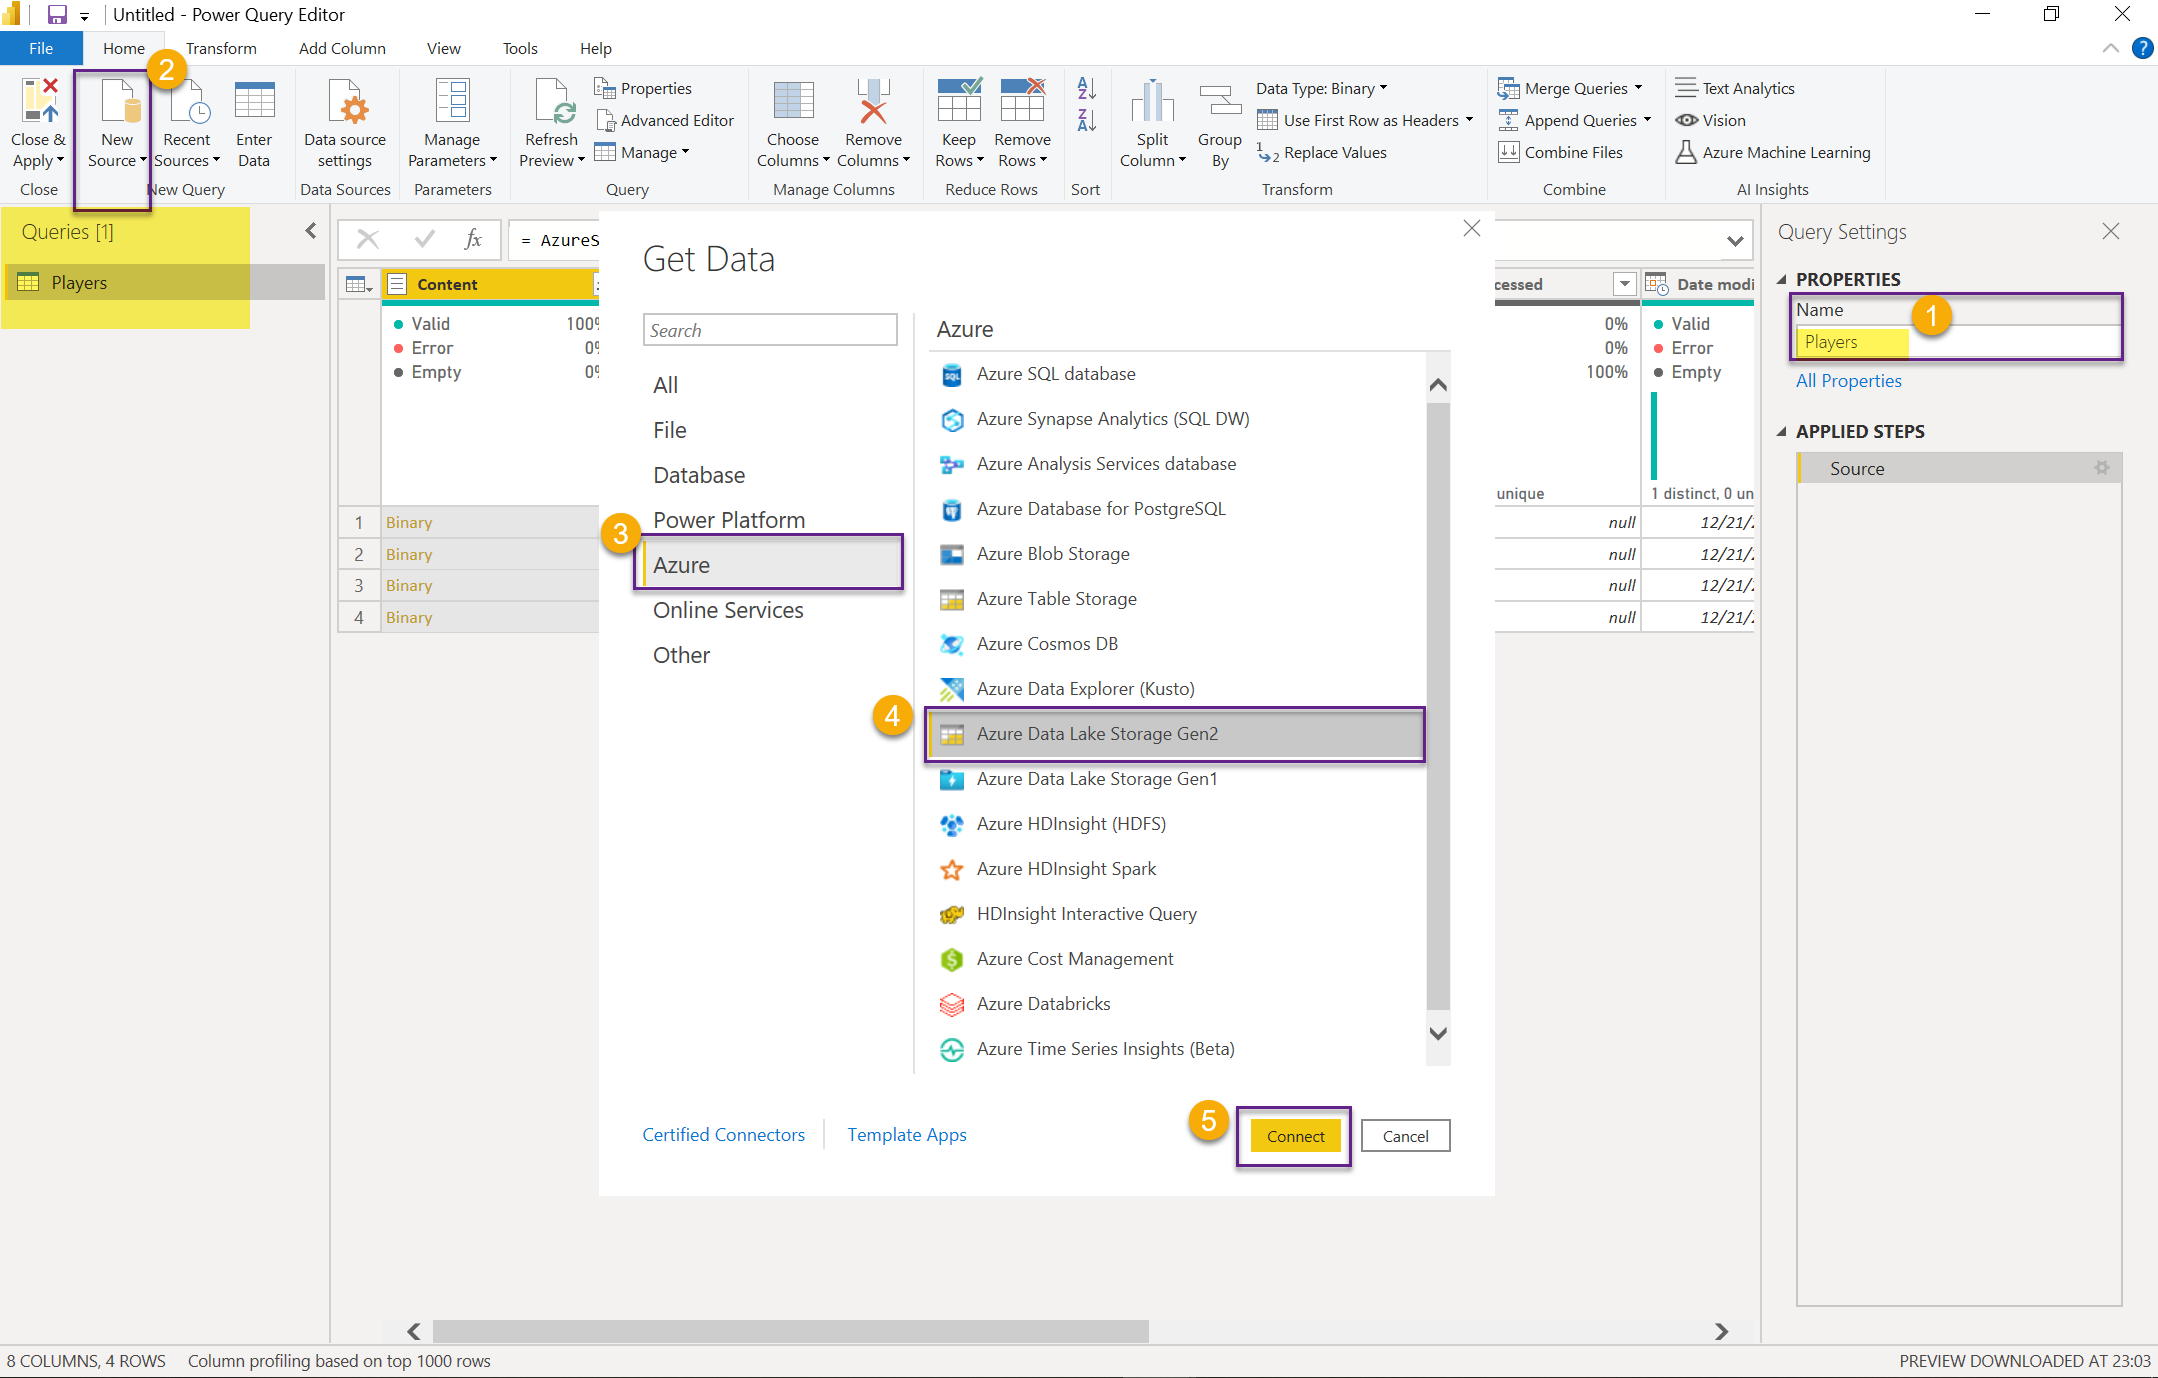
From the Home tab in Power BI desktop, choose Get data and select More to get more data source options. Then, in the dialog box, select Azure Data Lake Storage Gen2 from the Azure category and click Connect.
This will prompt us to provide the URL of the ADLS Gen2 account. ADLS gen2 URLs have the following pattern:
https:// <accountname>. dfs.core.windows.net /<filesystemname>/<subfolder>
Login to your Azure portal and do the following two steps:
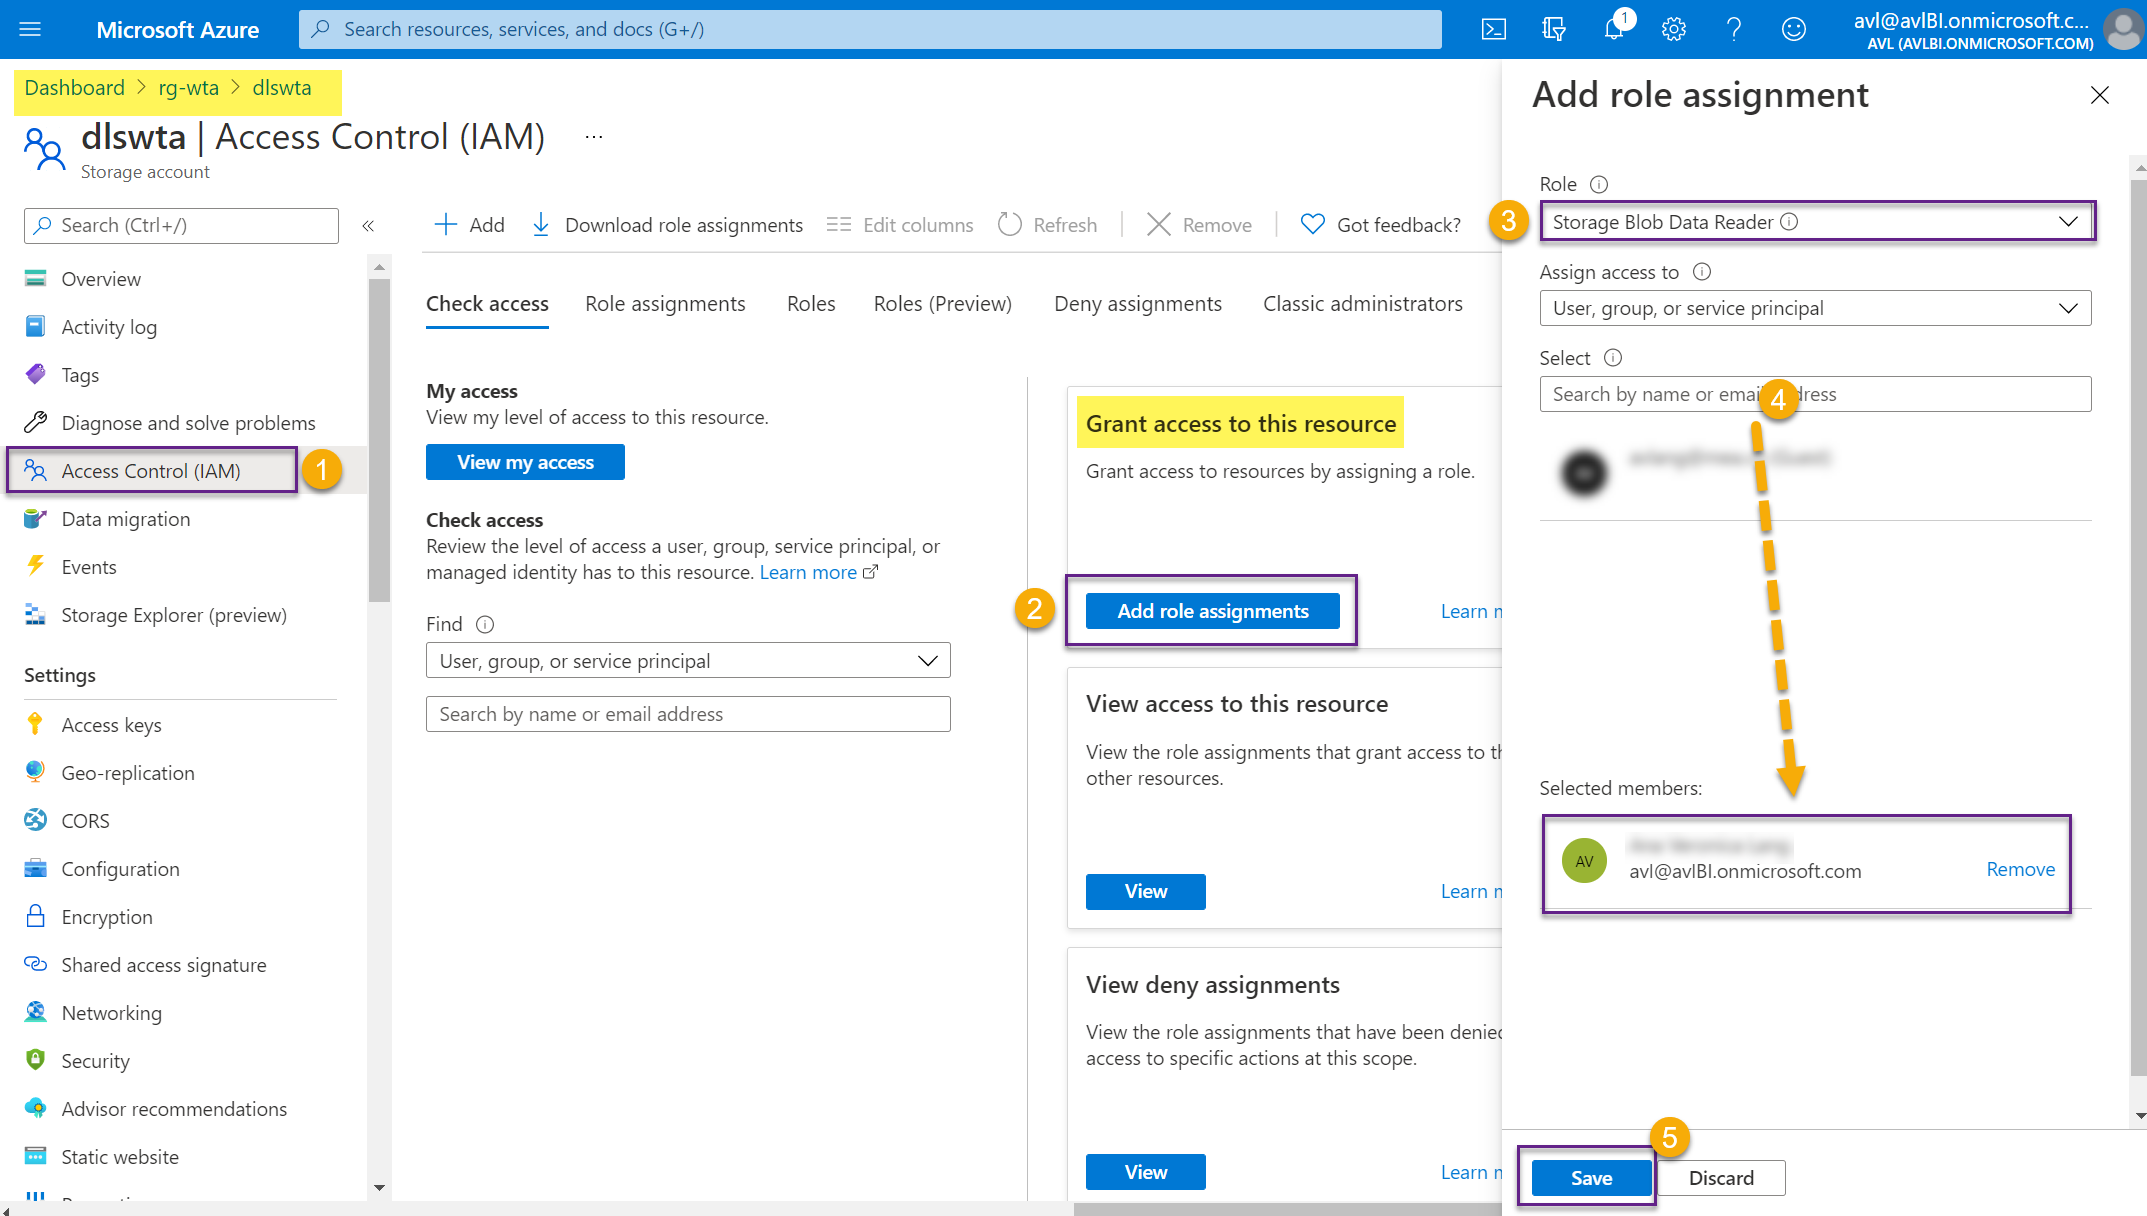
1. Assign Storage Blob Data Reader role to your Azure account
Go to your ADLS gen2 account and in the Access Control (IAM) section, click Add to Add a role assignment. Select the Storage Blob Data Reader role and your Azure account, then click Save.
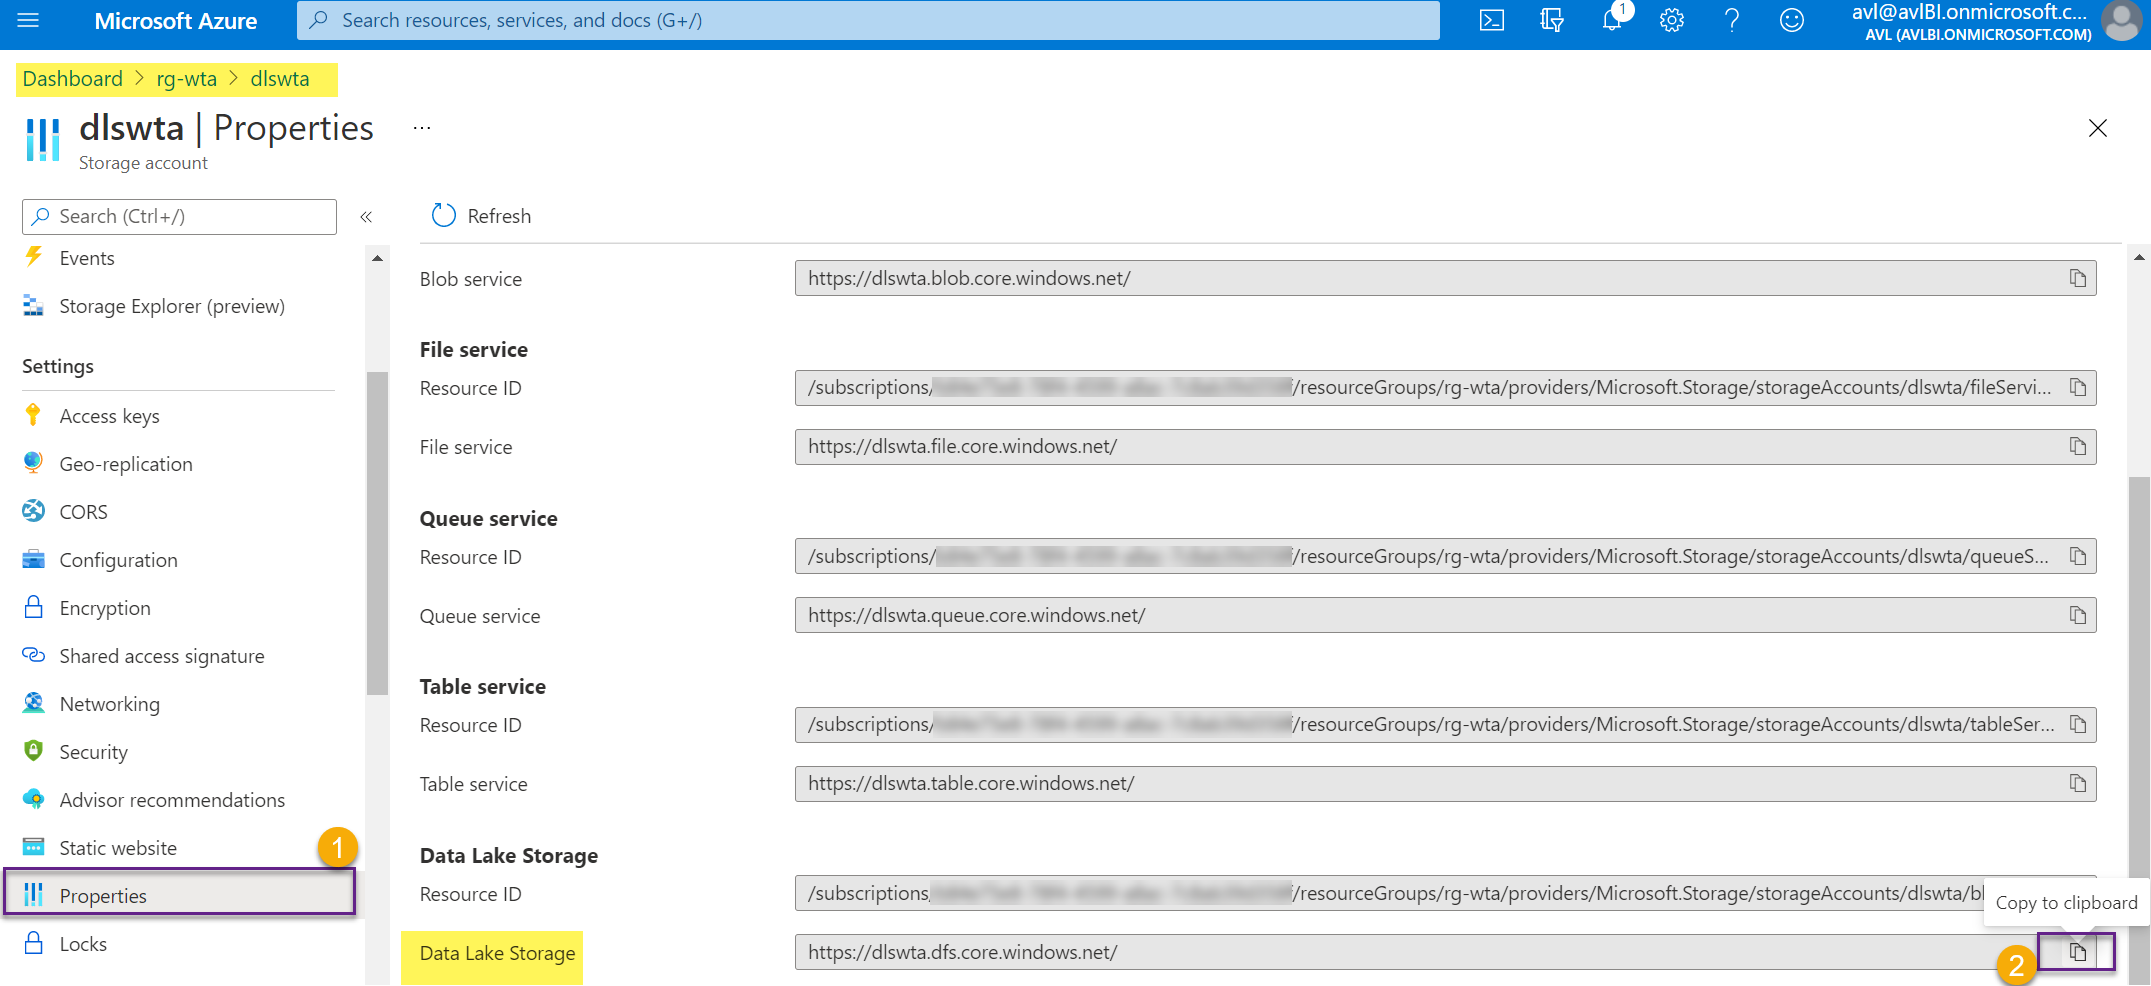
2. Get the ADLS gen2 URL
From the Properties section, locate Data Lake Storage and copy the URL to clipboard.
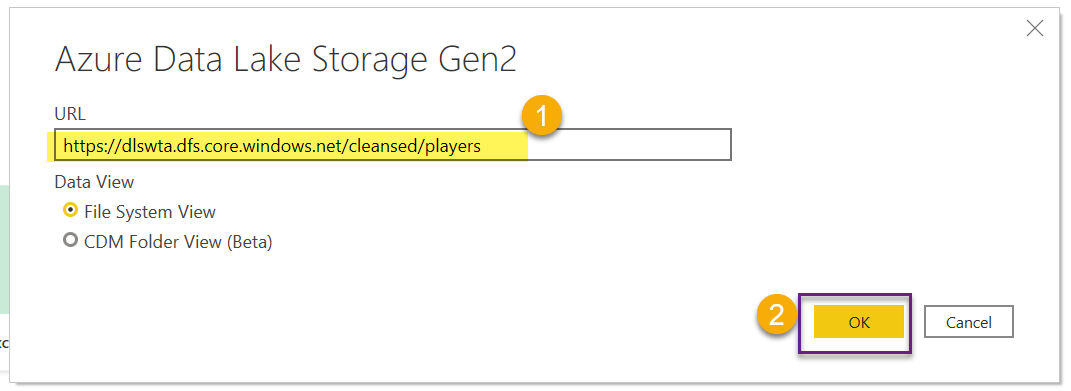
Switch back to Power BI desktop and provide the URL in the Azure Data Lake Storage Gen2 dialog box. Append <filesystemname>/<subfolder> to the URL. Let’s load the players data first. In this case we need to append cleansed/players. Click Ok.
You will be prompted to sign in to your ADLS account. Sign in, then click Connect.
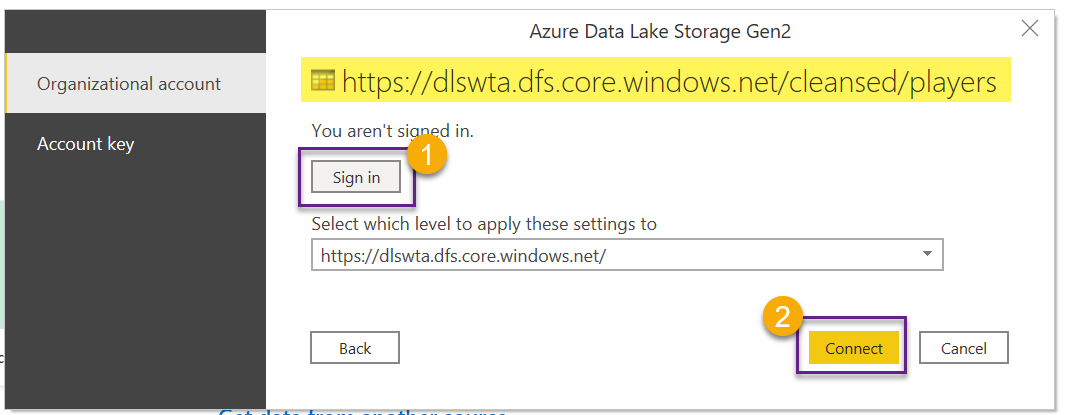
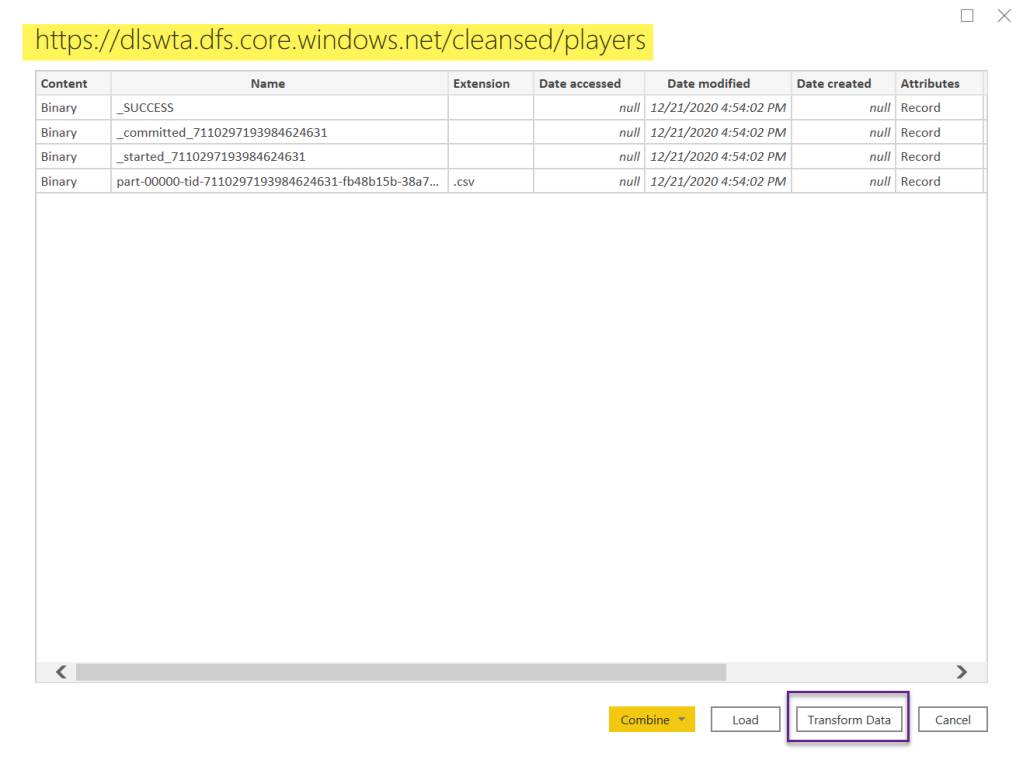
Now we have a connection to our ADLS account, and note that it displays the content of the players folder. Click on Transform Data.
This will open Power Query editor in a separate window. Name the current query Players. We will get back to it later. For now, let’s bring in the matches and rankings data files also.
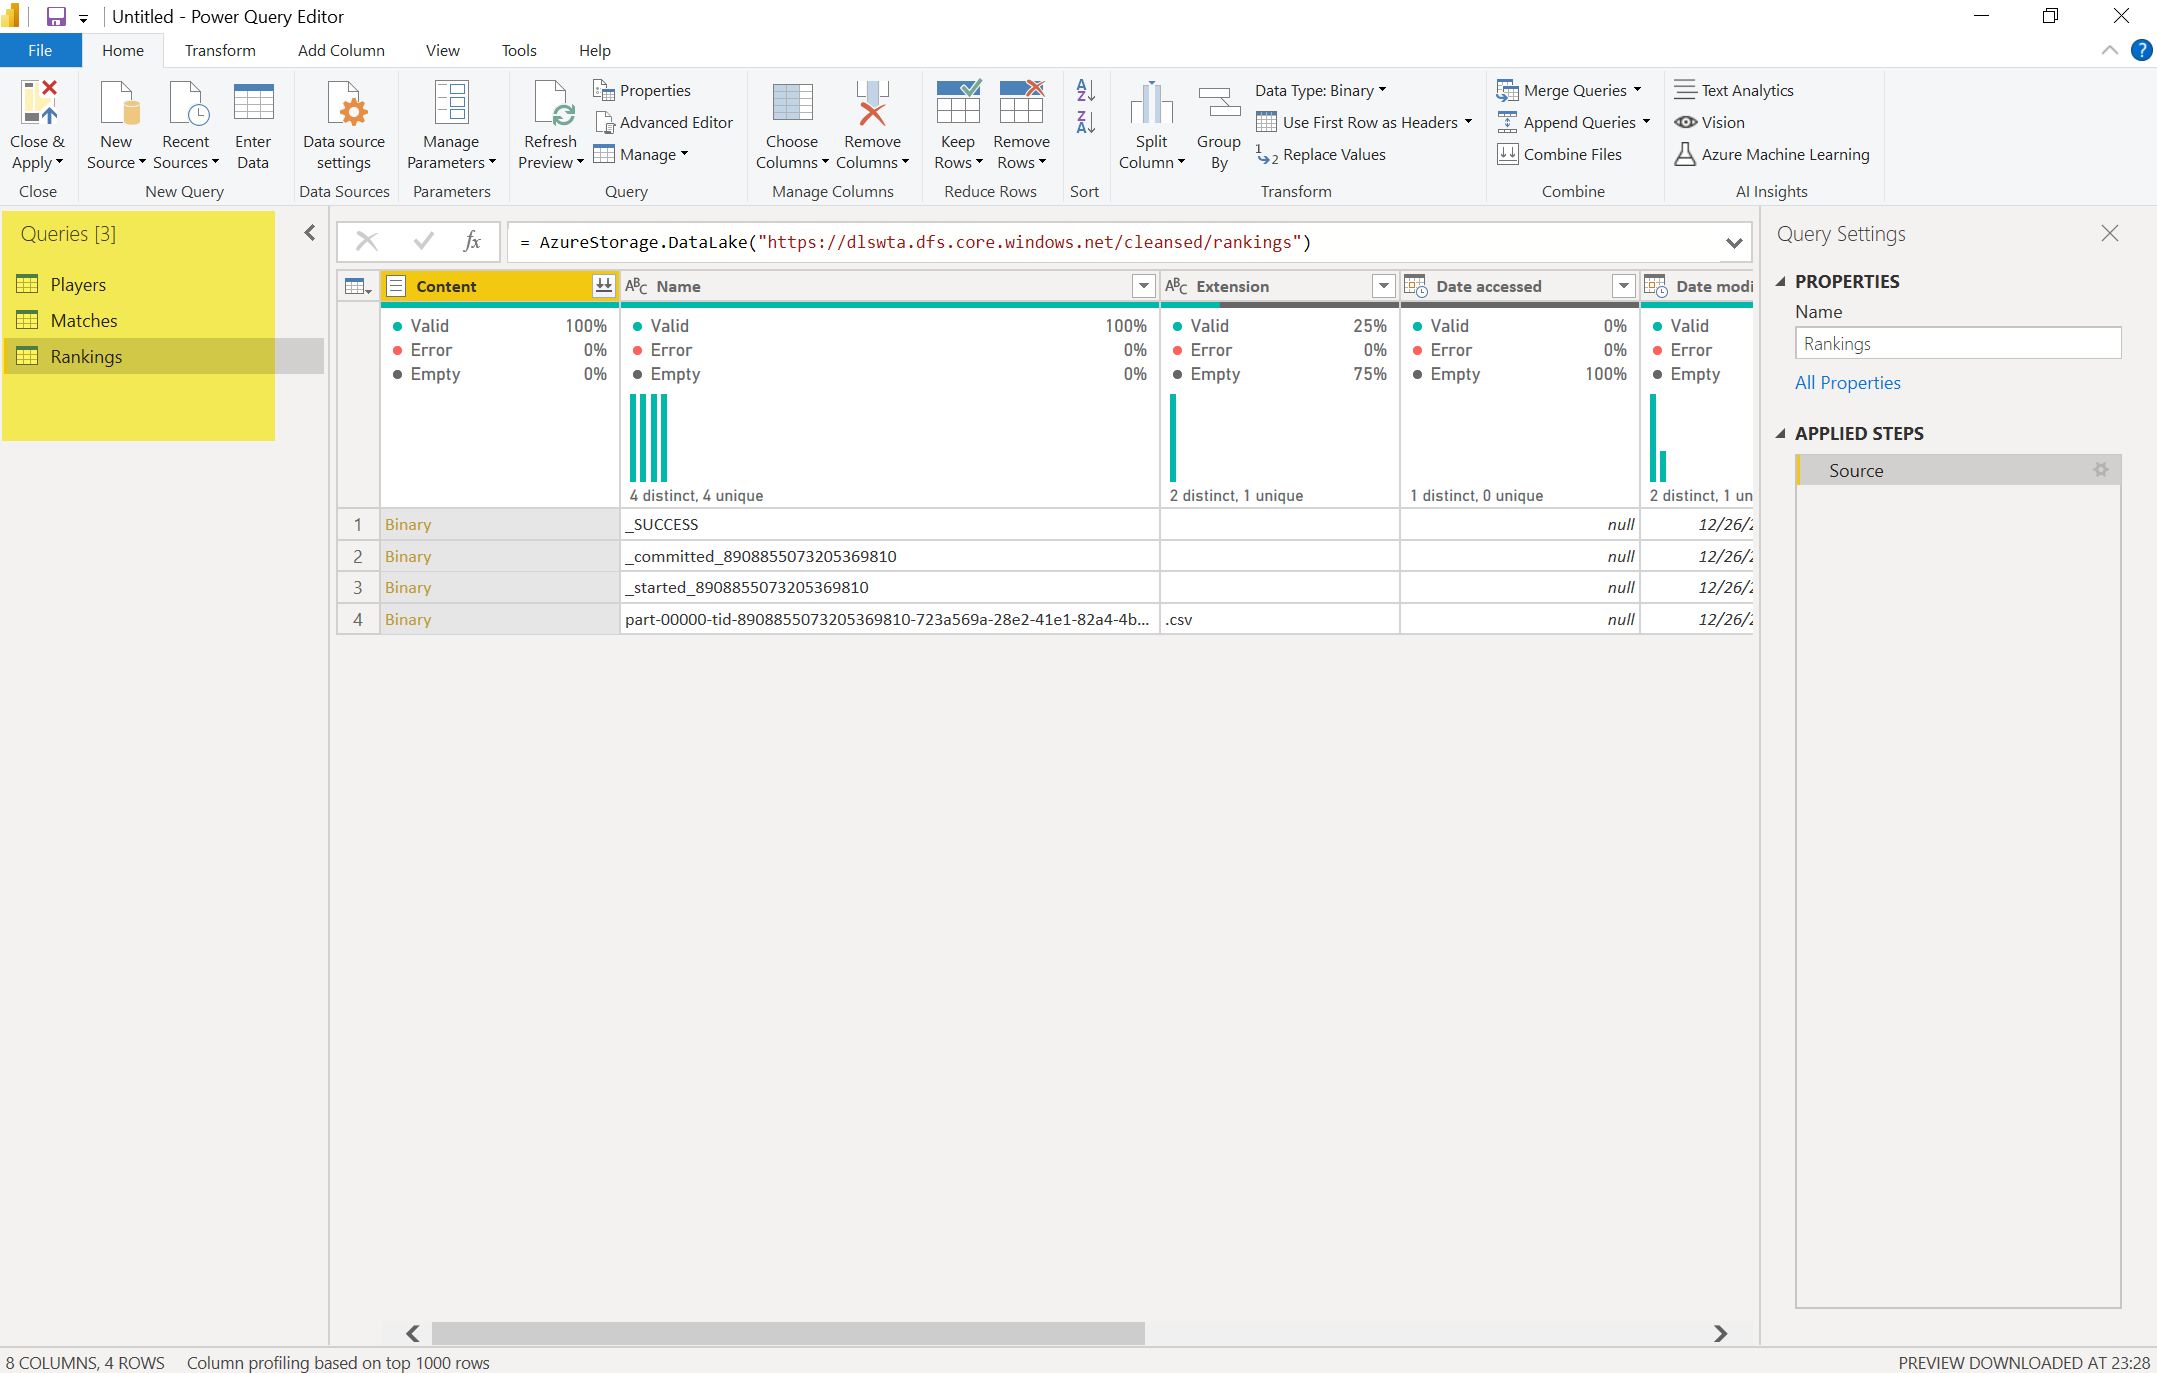
From the Power Query window, select New Source in the ribbon bar, and follow the steps described above to access the matches and rankings folders of the data lake.
Tip: You will have to append to the ADLS gen2 URL cleansed/matches and cleansed/rankings to connect to the matches and rankings data.
Name the queries Matches and Rankings respectively. Your Power Query editor should now look like in the image below.
Click Close & Apply to close Power Query editor and go back to Power BI desktop. Let’s save our work. Name the Power BI file WTA Insights. Power BI files have the extension .pbix
What’s next
Follow me in the next post, where we will use Power Query to shape and transform the three queries we have just created.
